How to Set Up Coil Tattoo Machine: A Comprehensive Guide
List of key points:
1. Successful tattoo artists possess five common traits.
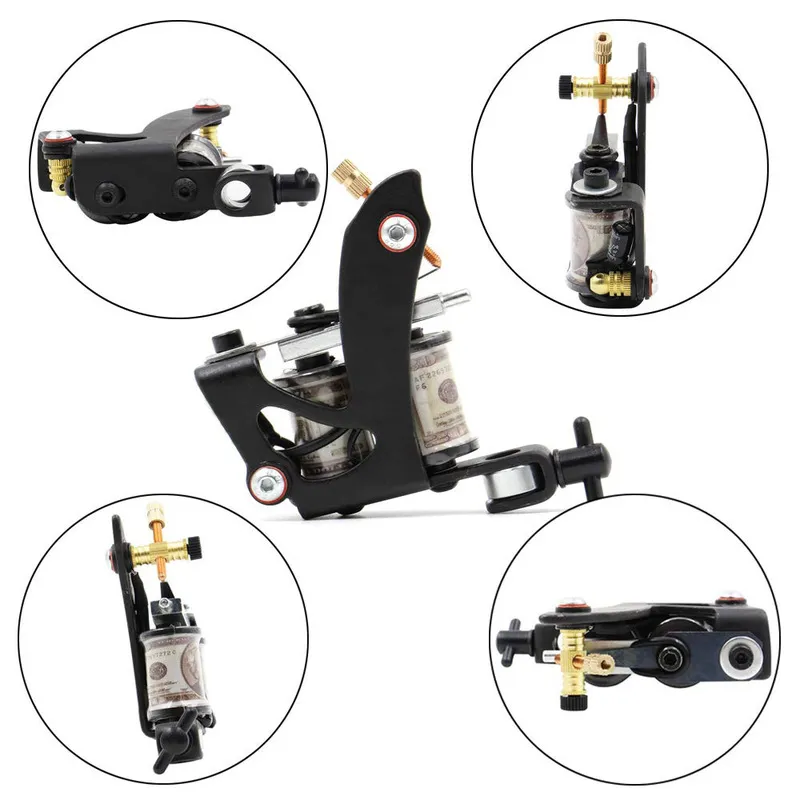
2. Coil tattoo machines are considered traditional and can be tricky to tune.
3. Many artists use separate machines for lining and shading.
4. Setting up a coil tattoo machine requires setting up the springs.
5. Putting a slight bend in the tattoo needle is necessary.
6. Sliding the needle through the tube carefully is important.
7. Adjusting the tube to align the needle properly is crucial.
8. If the needle does not go all the way back into the tip while tattooing, it won’t pick up ink.
9. A rubber band around the machine applies pressure to prevent bouncing and improve line work.
10. Attaching a clip cord to the back of the machine and turning it on with a foot pedal or power button is necessary.
11. Voltage of 4 volts is recommended for shading and 5.5 volts for lining.
12. Cycles Per Second (CPS) of 120 is recommended for shading and 130 CPS for lining.
13. Stroke of 3mm is recommended for lining, 3.5mm for black and gray, and 4mm for color packing.
14. Moving the contact screw adjusts both the stroke and CPS.
15. Duty below 50 means the machine spends more time off than on during a cycle.
16. For a coil tattoo machine, adjusting the duty is necessary.
17. Adjusting the duty involves bending the back spring up or down based on the duty.
18. Setting up a rotary tattoo machine involves attaching the needle bar and cam wheel using an Allen key.
19. The tube and needle cartridge should be attached, followed by adjusting the depth of the needle.
20. The RCA cord should be plugged into the machine and power supply to power it.
21. A machine bag should be placed over the machine and secured with grip tape.
22. Disposable grips can be used instead of an autoclave, eliminating the need for a machine bag.
23. Changing the cam wheel on a rotary machine is briefly mentioned.
24. For a coil tattoo machine, a 4mm stroke is recommended for linework or color packing, and a 3mm stroke for black and gray.
25. Pen machines are simple to set up and good for beginners.
26. Many pen machines have a set stroke of 3.5mm.
27. Pen machines usually come in two parts, with the upper half being the rechargeable battery.
28. Needle cartridges are used in tattoo pens and are locked into the grip by twisting them.
29. Needles with a membrane are recommended to prevent contamination.
30. Needle depth can be set by floating the needle and lining it up with the bottom of the cartridge.
31. The machine can be wrapped in a clip cord cover or have disposable grips if an autoclave is not available.
32. Wireless pen machines have a power button at the top, while machines requiring an RCA cord need to be plugged into a power supply.
33. Voltage adjustment is required for pen machines with an RCA cord.
34. The author prefers 8 wrap coils with a softer back spring and stiffer front spring for lining tattoos.
35. Running at low volts and a duty cycle of 45-50% allows for a longer throw and prevents blowouts.
36. For shading tattoos, a heavier gauge back spring and softer front spring with bigger coils may be required.
37. The size and weight of the frame affect the machine’s performance.
38. The air gap for lining is the thickness of a dime, and for shading, it’s the thickness of a nickel.
39. Tuning liners involves unscrewing the back spring, twisting it, and bending it towards the contact screw to achieve a specific gap.
40. Similar tuning process applies to shaders, but with thicker gaps.
41. Bending the front spring and using weaker springs can help the machine run at lower volts.
42. Having the right air gap and sound does not guarantee proper machine operation.